

Creating a Load

Shippers can Create Load and then choose to assign directly to a carrier or post the load to the board.
Overview of Create Load
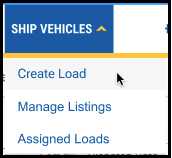
1. Under the Ship Vehicles tab, click Create Load
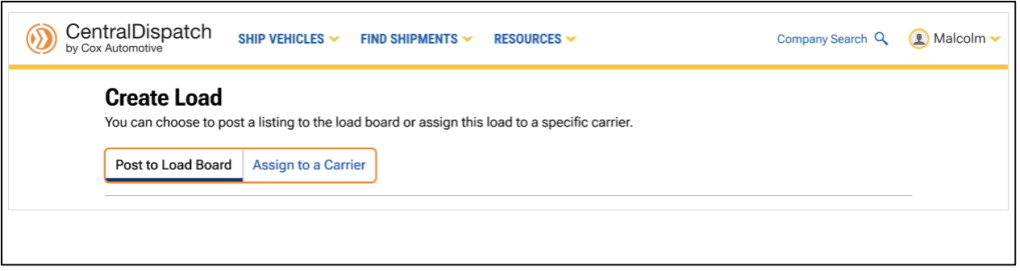
2. From the Create Load page, choose to post the listing to the load board or assign the load to a specific carrier
- The page defaults to Post to Load Board, or click on Assign to a Carrier
- Users can toggle between the Post to Load Board and Assign to a Carrier tabs without losing any load information that was entered
Post to Load Board Tab
1. Enter load information:
- Type-ahead functionality for address fields speed up data entry and encourages accurate address entry
2. After the load is posted to the board, open Manage Listings to assign to a carrier, modify, archive, or delete a listing
- Manage Listing page contains links to easily toggle between pages

3. Click on the Assigned Loads tab to:
- Edit the dispatch information
- Cancel the dispatch, including the ability to re-list or assign to a new carrier

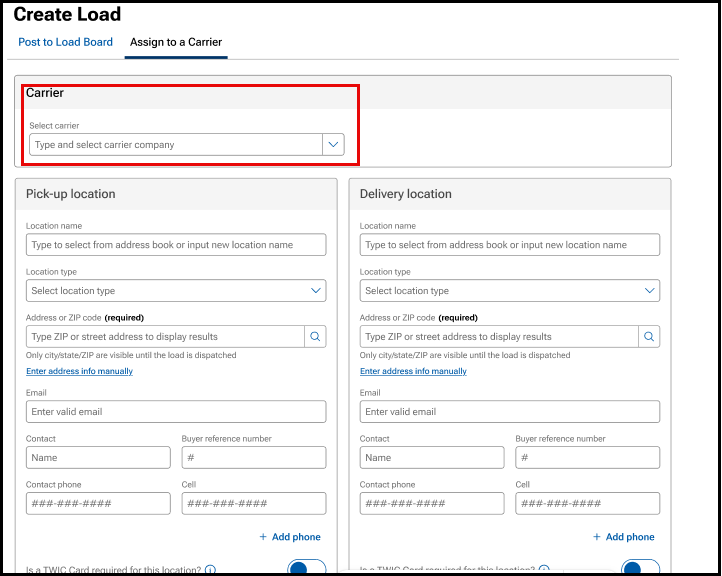
Assign to a Carrier Tab
1. Select Carrier field is added to the top of the page
- Slide bar will appear with a carrier scorecard, including performance data, FMCSA data, and a summary of any warnings associated with the carrier to allow for additional investigation. A warning could indicate a recent change in phone number or email address, and are indicated with the triangle icon
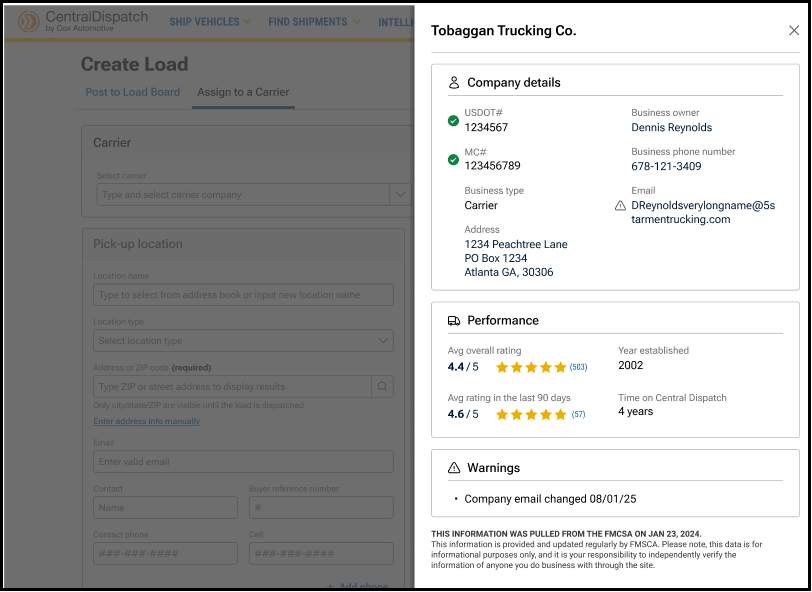
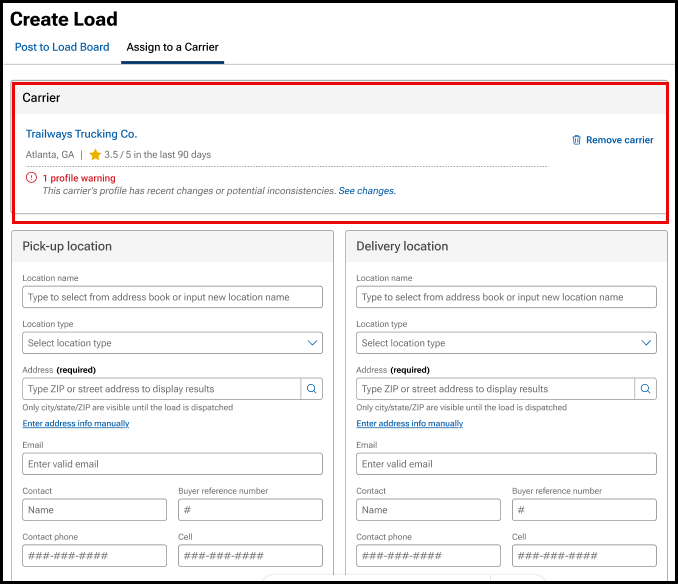
- Carrier name, scorecard, and any carrier warnings display below the carrier selection, making them easier to review
- Click on the trash can icon to remove carrier
2. Enter load information
3. After the load is assigned to a carrier, click on the Assigned Loads tab to:
- Edit the dispatch information
- Cancel the dispatch, including the ability to re-list or assign to a new carrier

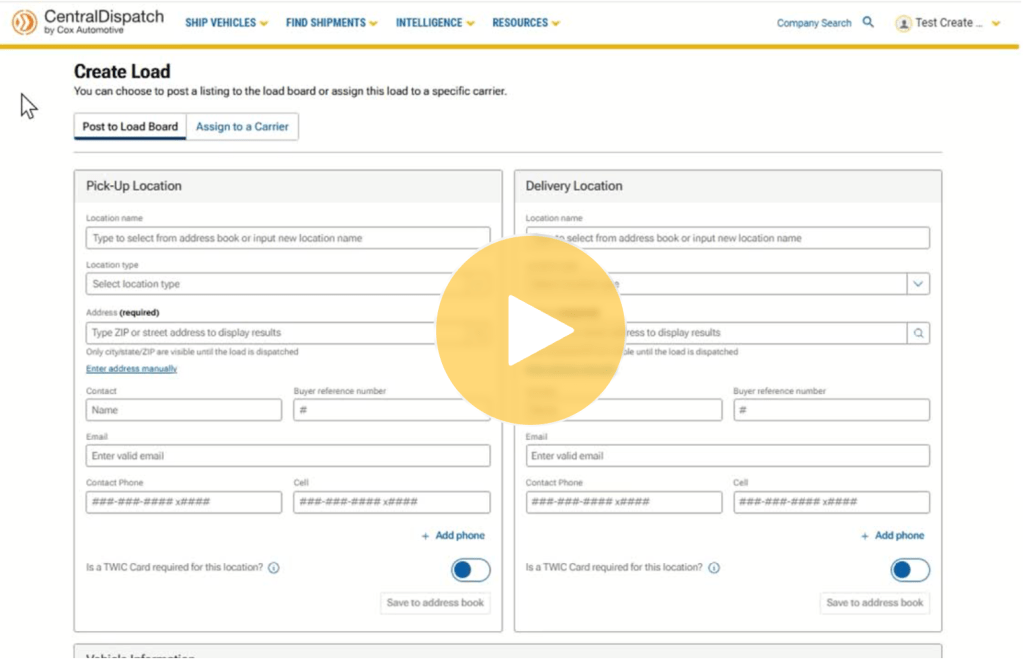
Entering Load Information
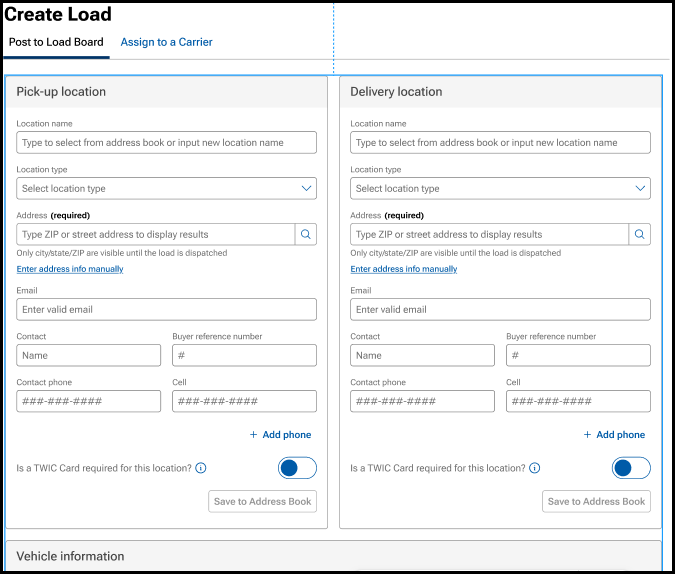
Step 1: Add Pick Up and Delivery Location Information
- NOTE: Only the city, state, and zip code of locations are visible to the carrier prior to accepting a dispatch. All other information is hidden
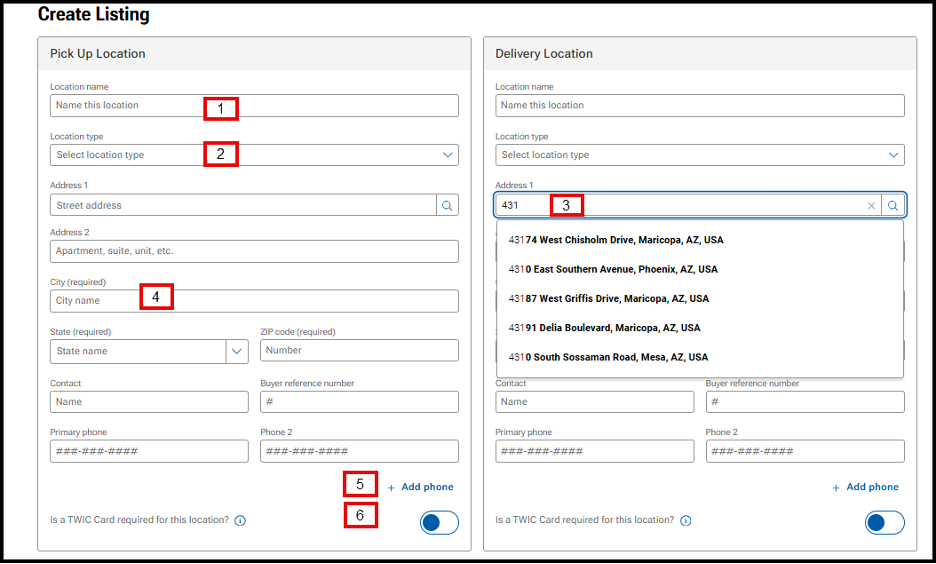
- Location name: Integrates with the address book to populate address and contact information
- Location type: Use the drop-down to choose the location type
- Address: Integrates with Google address lookup to predict and populate address information
- Note: If the address seems to be disappearing after entering, use the Enter key instead of the Tab key
- City/State/Zip code: All fields are required
- Note: Entering the Zip Code will auto-populate City and State
- Phone: Add up to 4 phone numbers for listing by clicking Add Phone
- TWIC Card toggle: Indicates if a TWIC Card is required for location access
- Tooltip text reads: A TWIC (Transportation Worker Identification Credential) is a credential required by the Maritime Transportation Security Act for carriers to access some locations. If you are not sure if a TWIC is needed, please contact the location.
Step 2: Add Vehicle Information
- Note: VIN is hidden from carrier view until the dispatch has been accepted
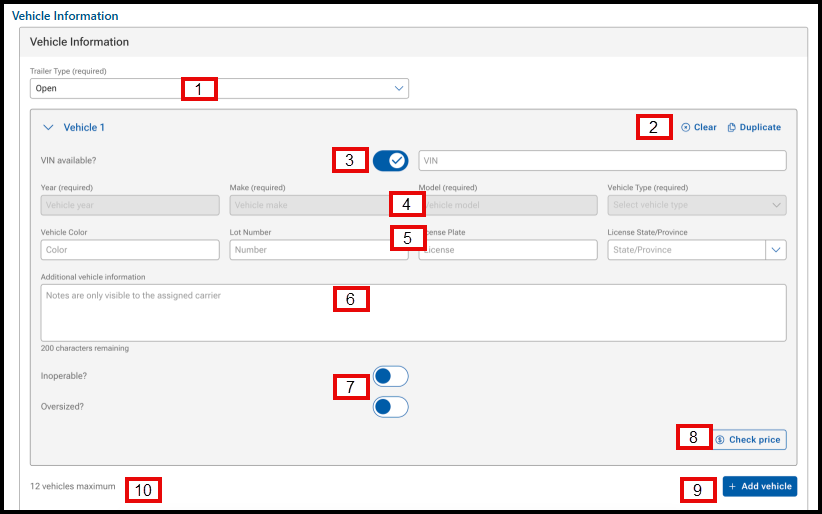
- Trailer Type: Required field. Use the drop-down menu to select the trailer type
- Clear and Duplicate buttons: Clears vehicle information and allows user to duplicate a vehicle (replaces the quantity), respectively
- VIN available? and VIN: VIN available? toggle is defaulted to on, allowing the user to enter the VIN. When the VIN is entered, the Year, Make, and Model (YMM) fields will populate by VIN decoding
- Year/Make/Model/Vehicle Type: Required field. If you enter the VIN, it will be populated by the VIN decoder
- NOTE: If the year of the vehicle is older than 1981 or a specialty vehicle:
- Uncheck the toggle for VIN available?
- Under the Vehicle Type field, use the drop-down to select Other
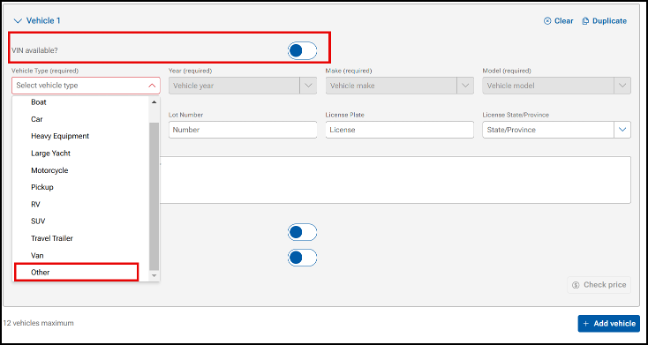
- NOTE: If the year of the vehicle is older than 1981 or a specialty vehicle:
- Vehicle Color/Lot Number/License Plate/License Plate State: Not required fields, but may be helpful for a carrier to locate a vehicle on a lot
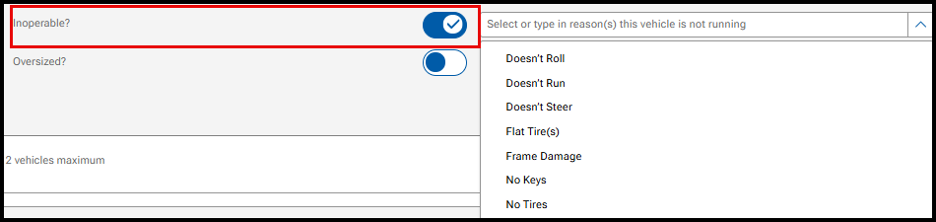
- Inoperable/Oversized: Toggles available to indicate operability of vehicle and if oversized
- If Inoperable: Use the drop-down menu to indicate why the unit is inoperable. This information is available to the carrier
- Check Price: Opens the Price Check tool to view prices on comparable loads
- +Add vehicle: Add additional vehicles to the listing
- Note: User can add up to 12 vehicles to a listing, dictated by the maximum carrier trailer capacity
Step 3: Add Dates
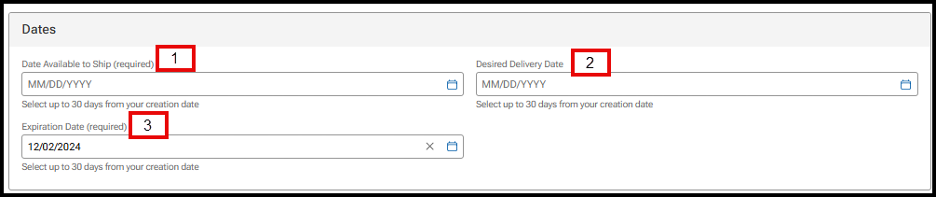
- Date Available to Ship: Required field. Use the calendar icon to select the date the vehicle will be available. Users can select up to 30 days from the listing date
- Desired Delivery Date: Not required. Use the calendar icon to select the desired date for the delivery of the vehicle. Users can select up to 30 days from the listing date
- Expiration Date: Required field. Defaulted to 14 days, but you can use the calendar icon to extend up to 30 days from posting
- Listings that are 30 days from the posting date will be auto-archived and visible under the ARCHIVED tab in Manage Listings
- Listings over 365 days will be removed from Listings
Step 4: Pricing and Payment
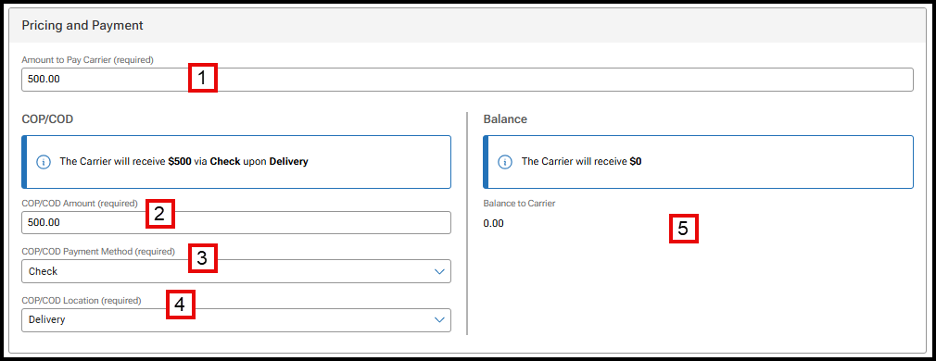
- Amount to Pay Carrier: Required field
- COP/COD Amount: Required field. Users can select the amount to pay a carrier at pick-up or delivery. This allows the ability to pay carriers partial at pick-up and the remainder at delivery
- COP/COD Payment Method: Required field. Use the drop-down menu to select if payment will be made by check or cash
- COP/COD Location: Required field. Use the drop-down menu to select if payment will be made at pick-up or delivery
Balance fields: If the total amount owed to the carrier is split between pick-up and delivery, the Balance fields will be populated and required
Step 5: Additional Information
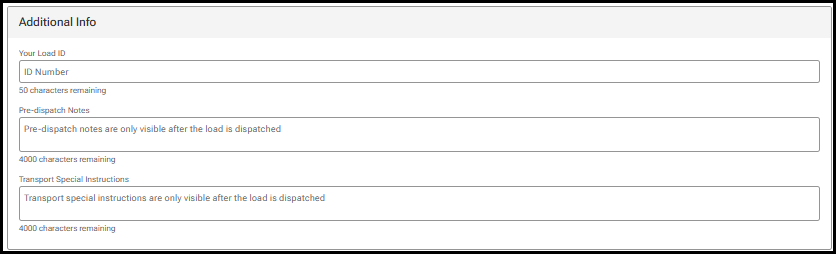
- Load ID allows shippers to enter information to identify a dispatch load. It can be up to 50 characters and anything a shipper chooses. If the Load ID is not populated, one will be generated by Central Dispatch
- Pre-dispatch Notes and Transport Special Instructions are only visible after the load is accepted
STEP 6: Add Your Contract Information
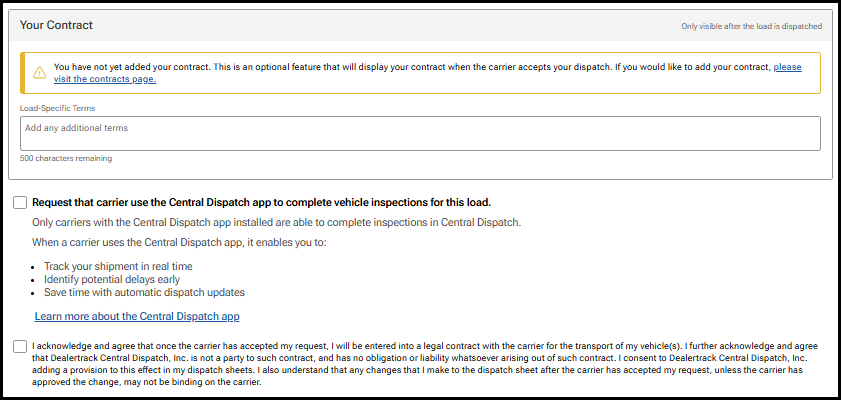
- Add Load-Specific Notes that will be visible prior to a carrier accepting the load
- Click the request carrier to use Central Dispatch mobile app if desired
- Click the acknowledge box:
- If posting to the load board, click the Acknowledge box, and click Post Load
- If posting to the load board, click the Acknowledge box, and click Assign Load

